North Carolina

Chasing Fall

The beautiful colors of autumn last only a moment before they fade into winter. If you hesitate you could miss the opportunity to capture the show.

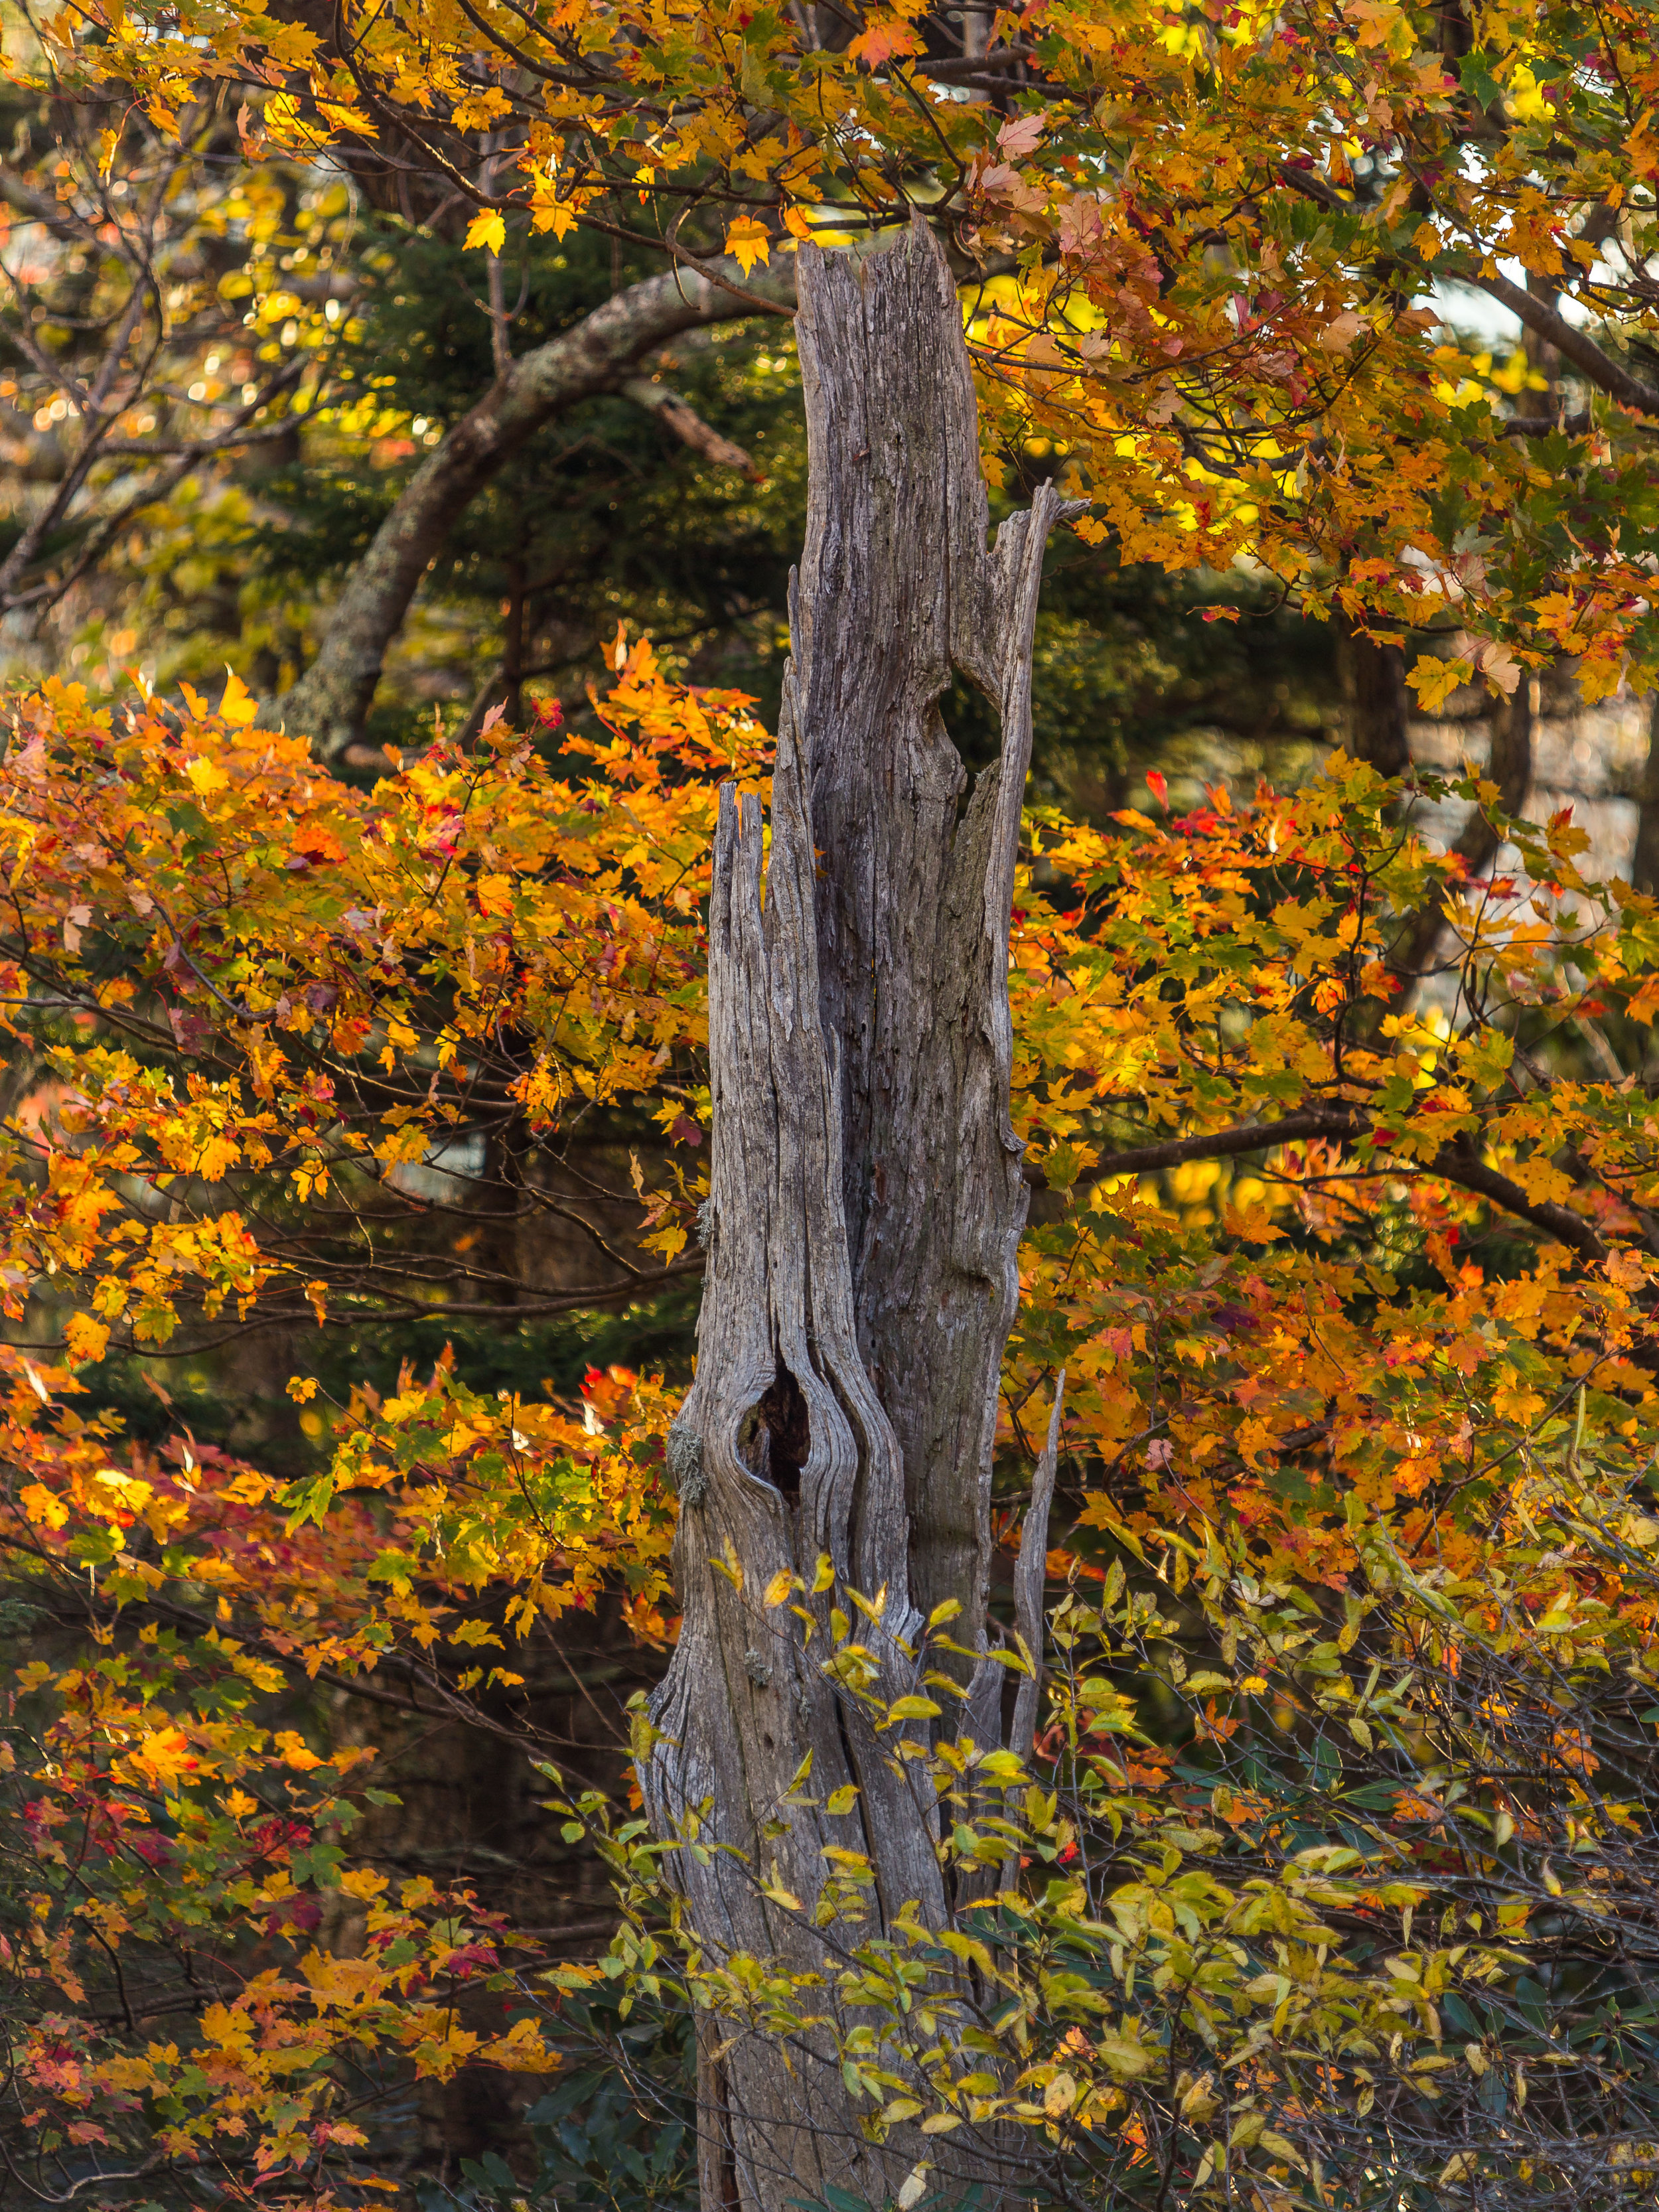
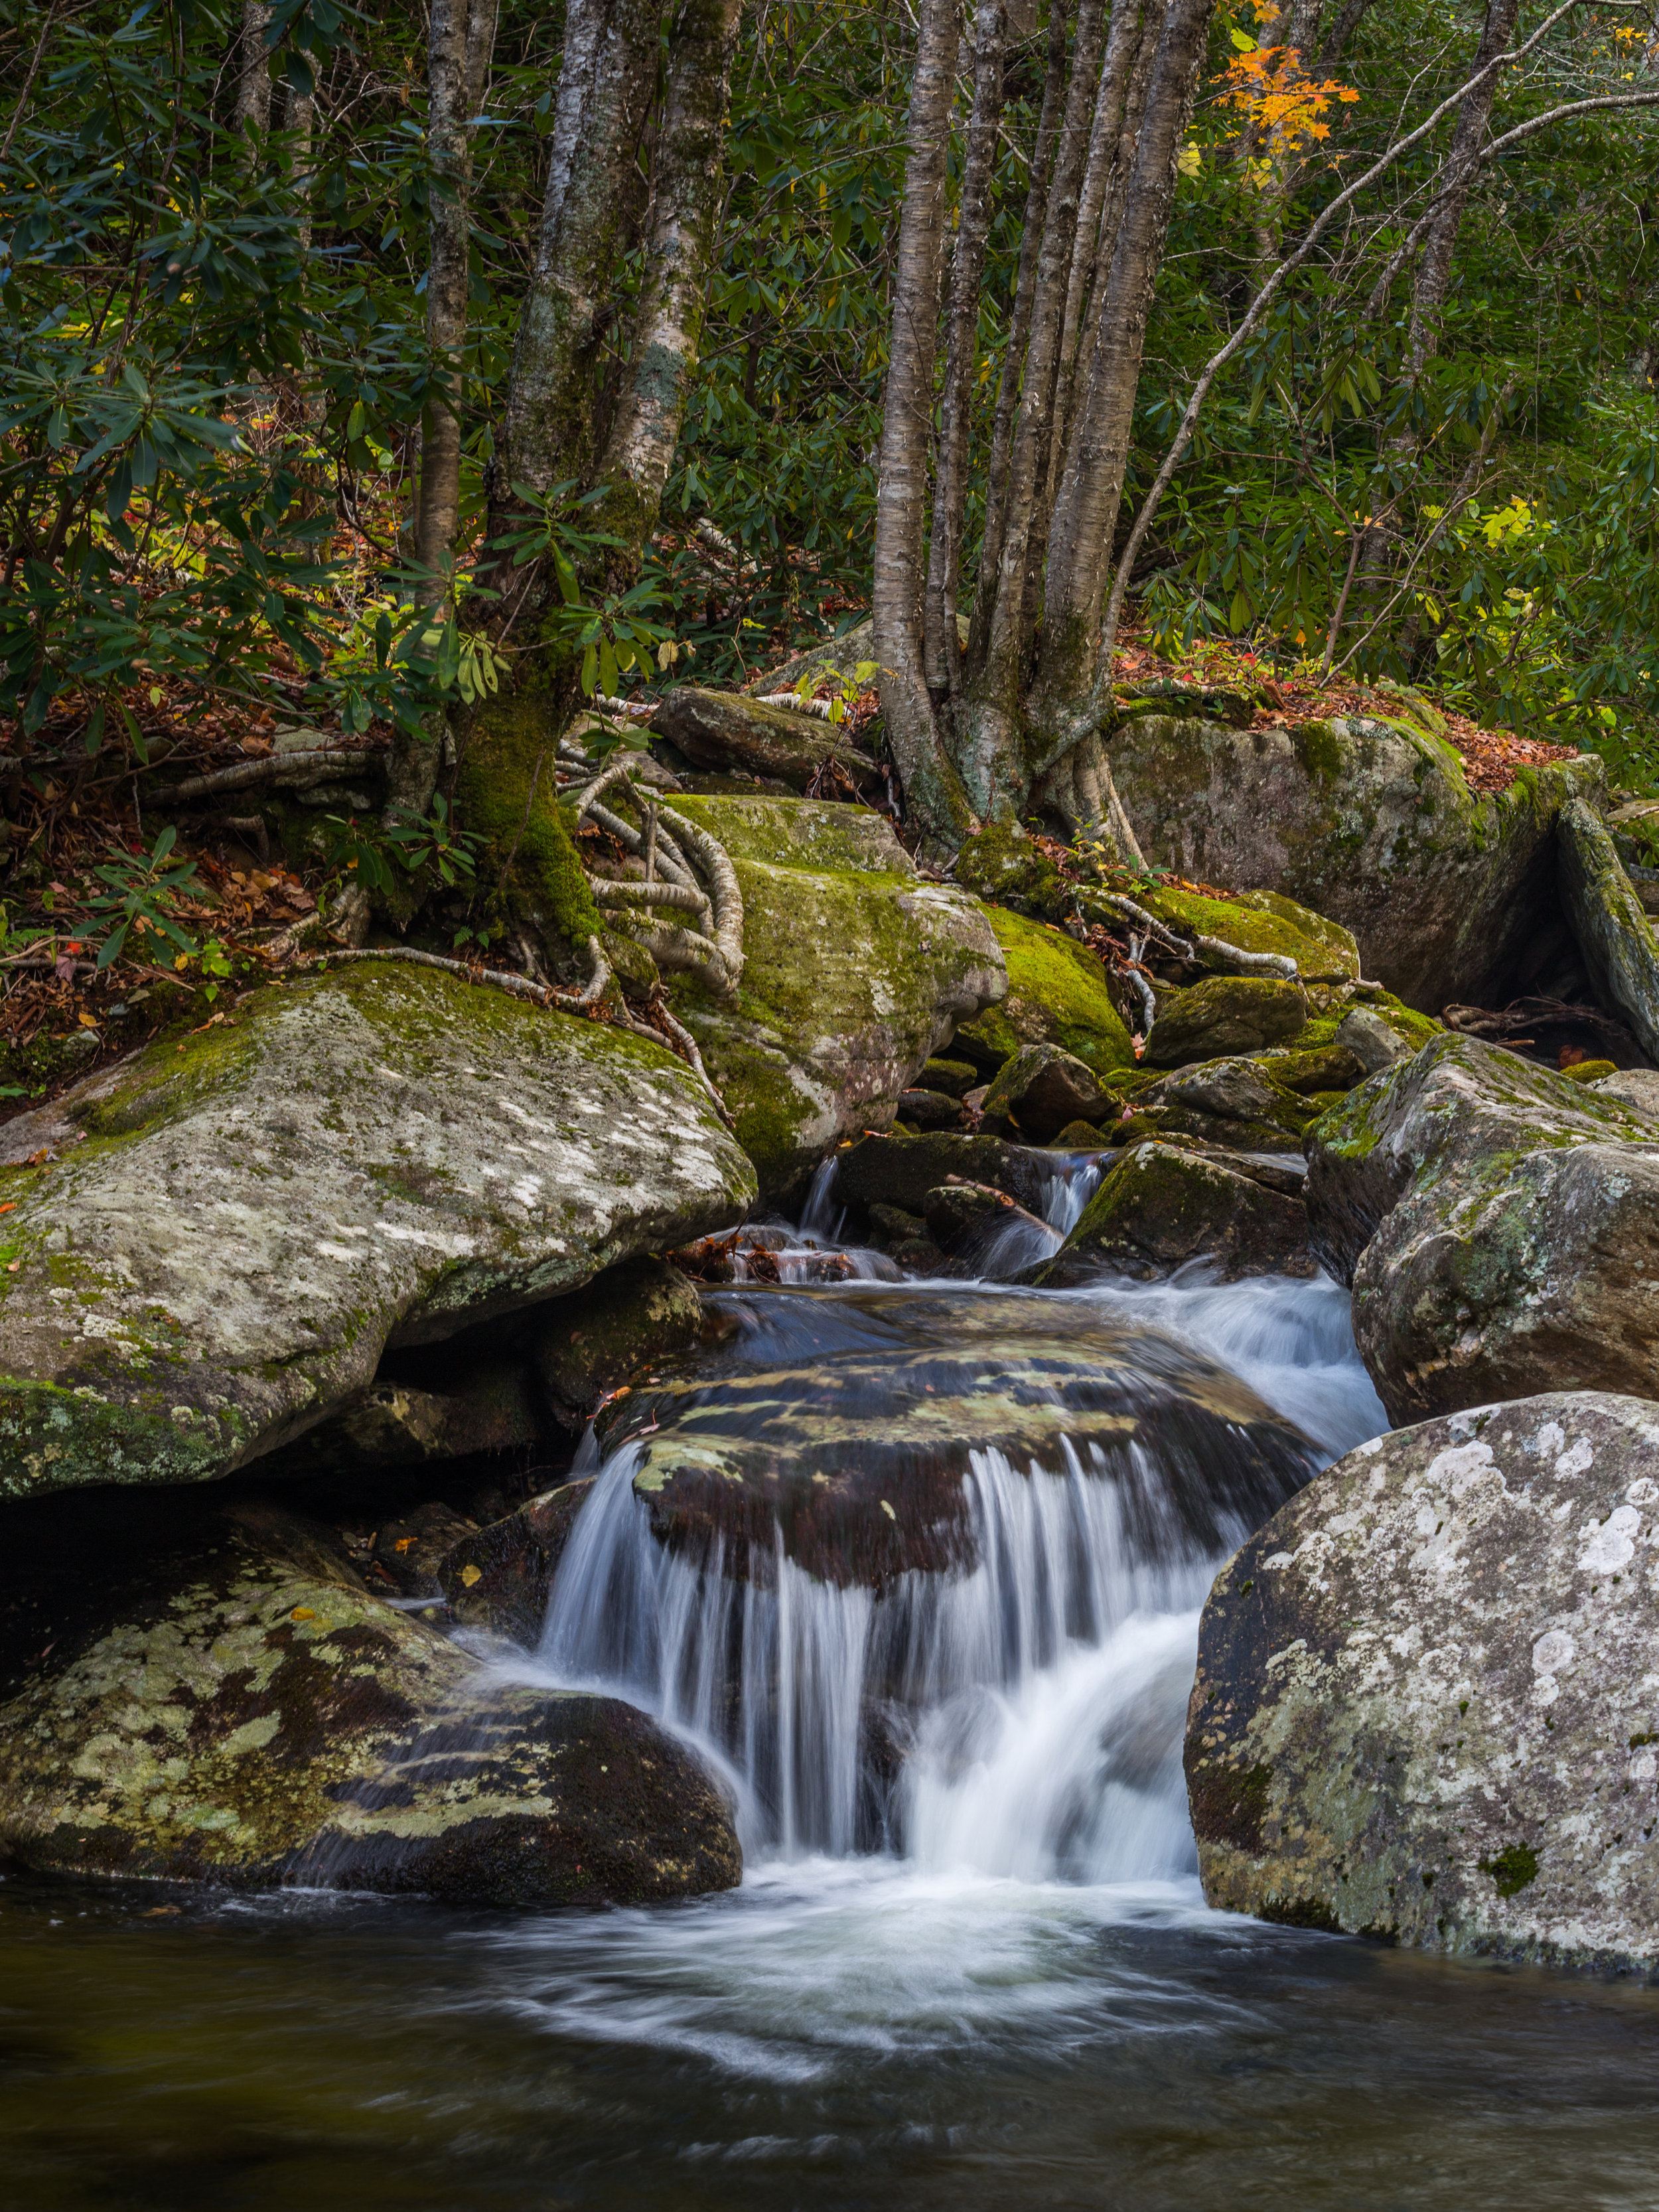
Over the past few weeks I have been traveling almost nonstop to different locations, trying to capture the autumnal display of the Appalachian Mountains. As is normally the case with fall photography I am exiting the season wishing I could have photographed more. This feeling arises from the understanding that during fall an almost endless supply of compositions expose themselves to the world as a seemingly normal forest bursts with color. On one occasion I spent the morning walking along the side of the Blue Ridge Parkway for a good 3 hours, only to find that I had traveled a mere one and a half miles from where I began. I wasn't upset with this however because I captured 3 images I am extremely happy with. Each image is unique and tells its own story.

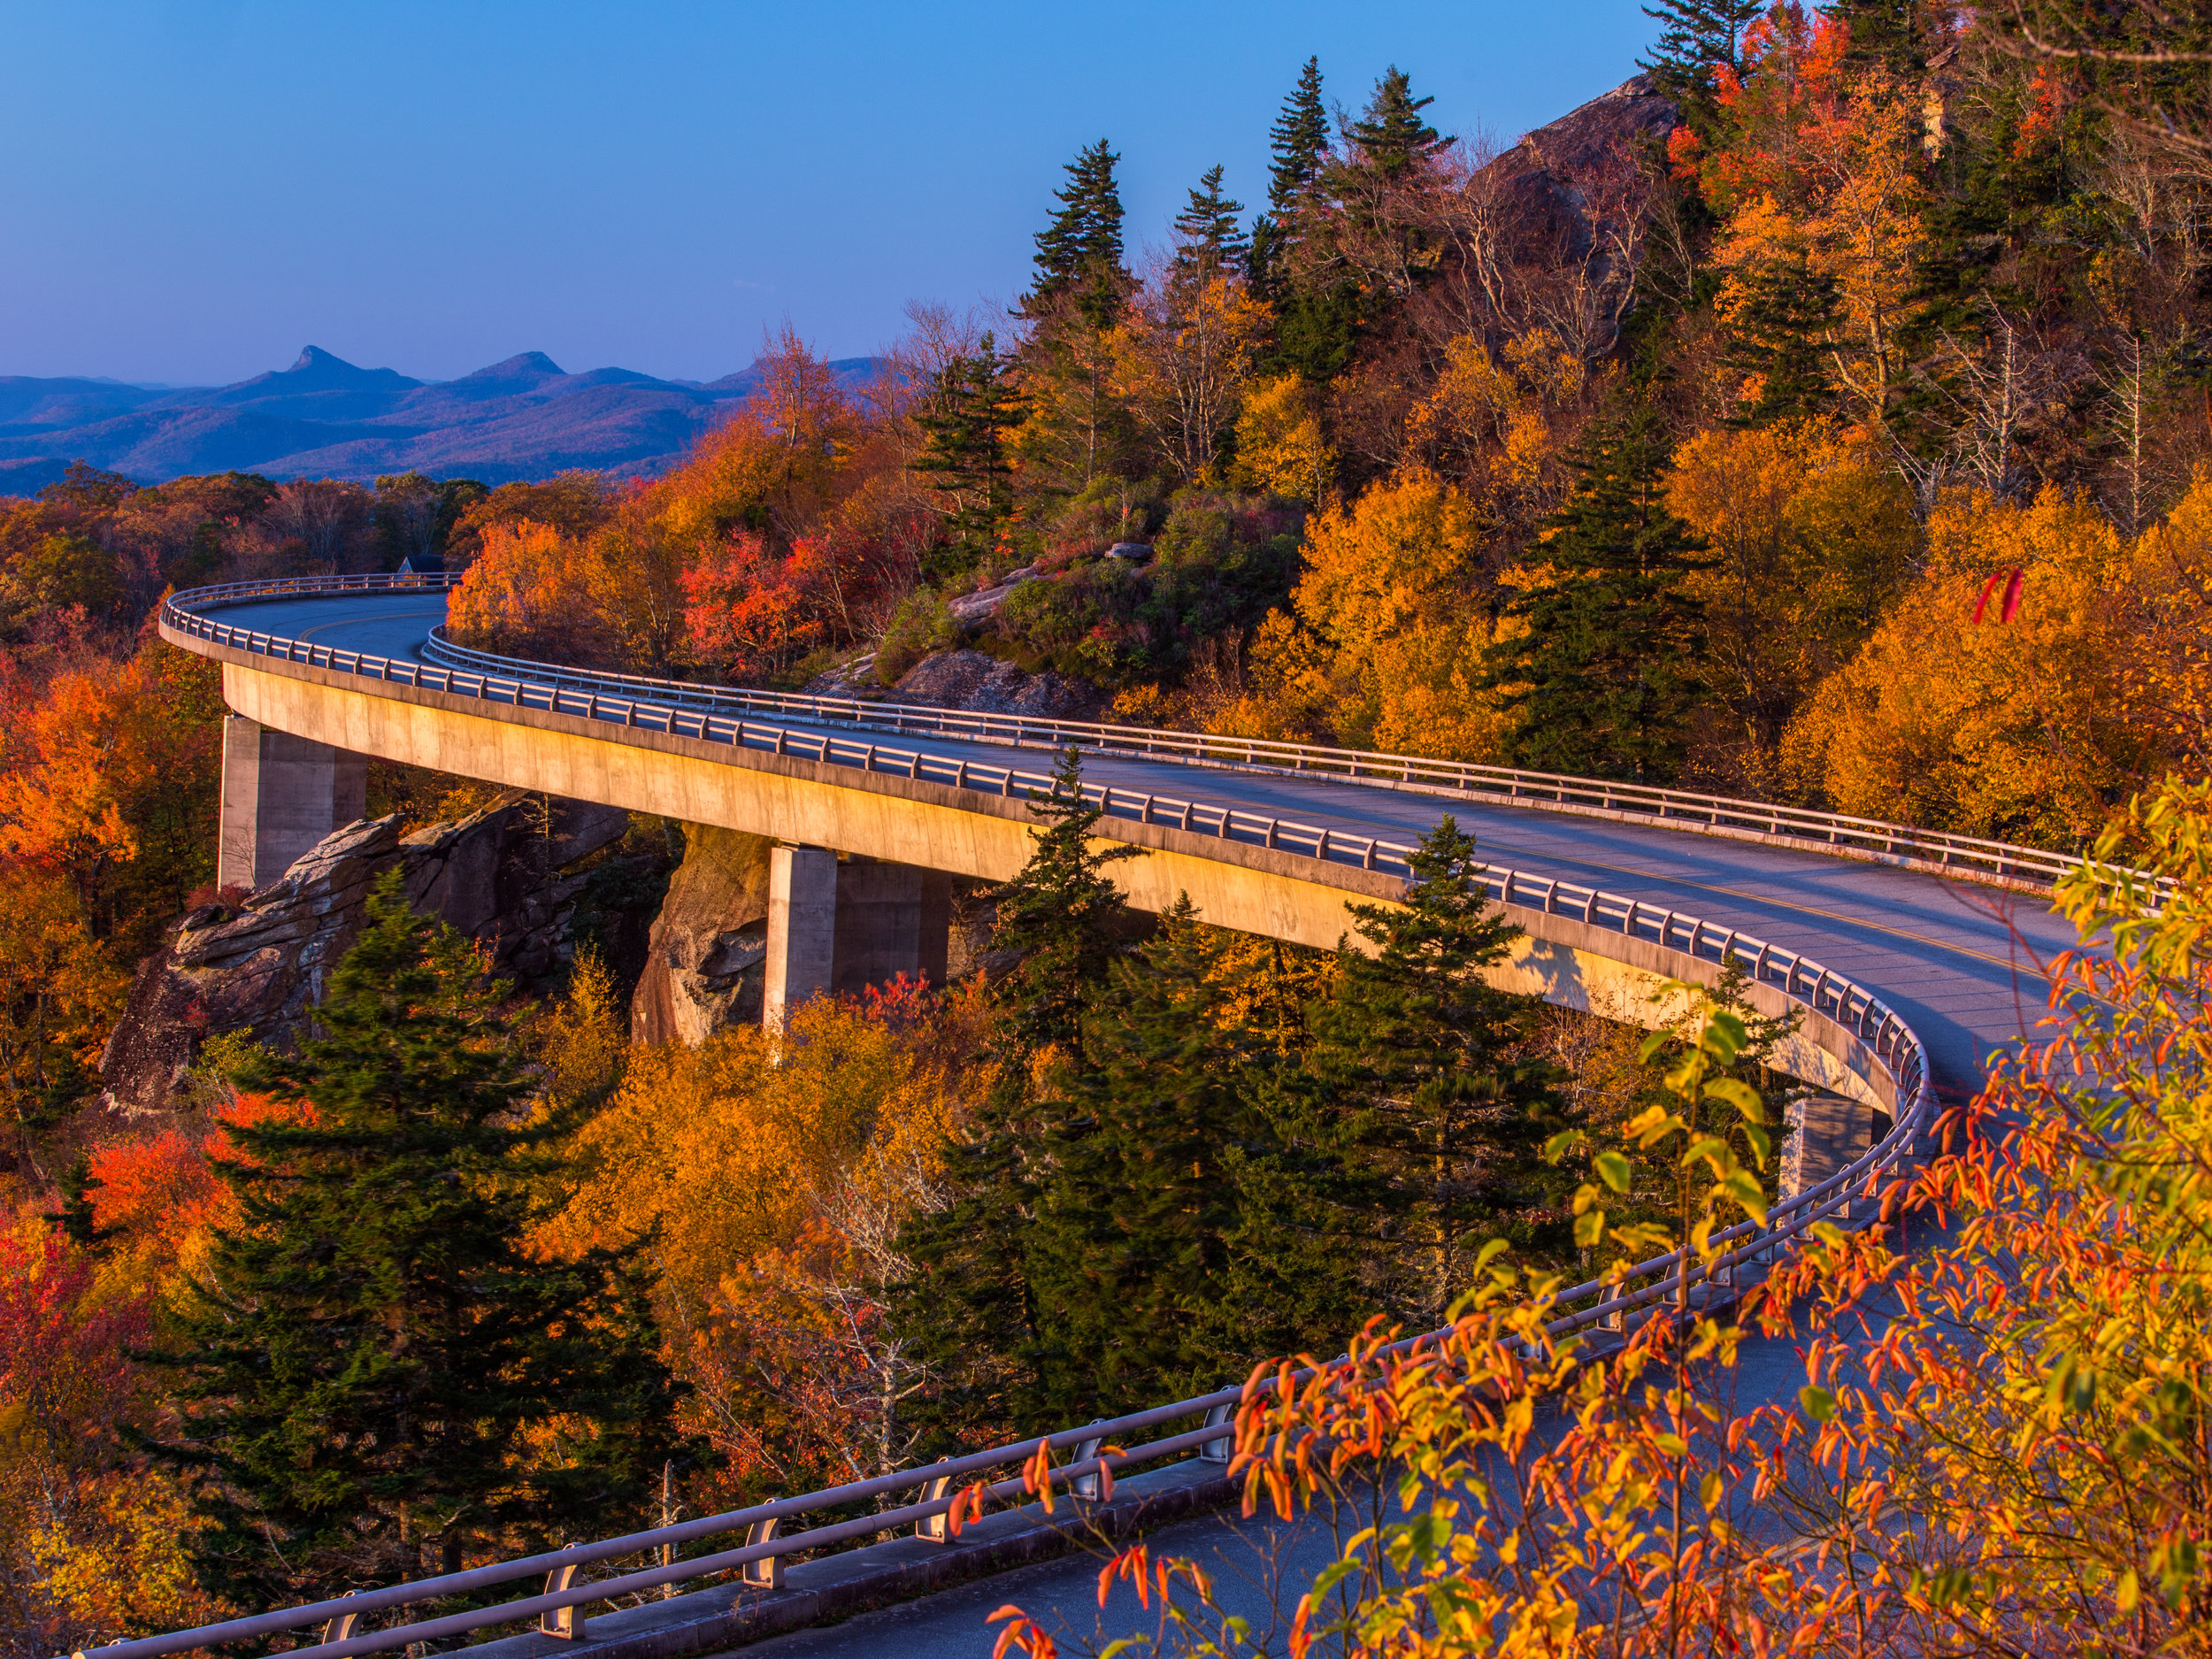
Although the good morning light disappeared by the time I returned to my vehicle I did not head home.  I noticed a good bit of cloud cover forming and decided to see what a view of my morning location looked like from an adjacent mountain. I was rewarded with this view and another image I enjoy.

IMG_7682-Pano.jpg

Staying out all day not only increases your chance of getting multiple images, it also allows you to scout new locations for future photographs. After the above image I went to Linville Gorge, a location I had been many times before but never photographed in the fall. I wanted to check out a place called "The Chimneys". The weather was turning unfavorable and my weather app was calling for rain by sunset, but I headed out under the understanding that I was at least scouting a place to return to if I could not create an image. I was able to find a unique location and I photographed it for reference to come back to under better conditions.

IMG_7720.jpg

As the clouds rolled in, the temperature began to drop and the wind picked up. Poor lighting and wind are two of landscape photographer's worst enemies. I decided to call it a day since I was in a new location and there were potentially dangerous obstacles between myself and my vehicle.  I took one final image on my way back to the car when the last few rays of light for the day peaked through the clouds.

IMG_7744.jpg

I was able to capture quite a few nice images in the 8 hours I was out in the field, and it set in motion a fall frenzy that I have been utilizing to capture the autumnal color as fall has progressed here in the Appalachian Mountains. Check back Wednesday for more fall photographic adventures. Until then I’ll be out looking for my next image. Enjoy!

IMG_7742.jpg

Landscape Photography: Advice for new locations and nerves


One of the most important qualities of a landscape photographer is having the ability to quickly adapt to ever changing scenarios and environments. We seem to be constantly thrown out of our comfort zone and into new experiences. I have 3 useful tips that I will share later in this post that might help ease you into your next photography scenario.

      Before I do that however, I want to give you a bit of background about myself. I have been photographing landscape images all across the United States for the past 6 years. I am from Cincinnati, Ohio and I am currently in North Carolina. In my current location, I may travel through 3-4 different ecosystems a day to get an image. From mountains and forests, to beaches and marshes, each ecosystem is unique and requires a different mindset to photograph them properly. I’ll discuss a bit about each ecosystem below.


Mountains


      Mountainous Regions are my bread and butter. I am definitely in my comfort zone when taking photos in the mountains. I use apps like Google Earth along with Photographers Ephemeris and skippysky.com to research when my best chance for the perfect shot will be. Late morning and afternoon light can be just as good as sunrise or sunset in the mountains and often allows for beautiful black and white images with the use of a polarizer. Study the scene and look for light falling into a valley or hitting the side of a mountain. Just before or just after a storm can create some of the most interesting scenes. Find a good leading line and then wait for the image to happen. Don't be afraid to get out your zoom lens and pick out details. The mountains are dynamic. Don't be afraid to add the human element. It can add a nice sense of scale to your image.  Always be looking around for unique compositions to show themselves and I guarantee you come home with a great image.

Linville Gorge,  Grand Canyon of The East

Linville Gorge,  Grand Canyon of The East

Forests

      The forest is the most common ecosystem on land and one that most of us are familiar with. At some point in your life, you probably have experienced a moment where sunlight was playing through the trees and thought to yourself how that might make an interesting picture. Next time this happens, I suggest you try to photograph it. While it is typical to photograph a forested environment in overcast or rainy weather for vibrant colors and subtle contrast, you can also capture wonderful wooded shots with sun as well. I recommend taking your sunny forest shots mid morning to late afternoon to keep your histogram happy. This will help reduce underexposing part of your image if the sky is visible. Personally, I tend to keep the sky out of my wooded images altogether. Another thought for the forest is to photograph macro and occasionally look down at your feet. There are tons of subtleties in the forest landscape, and if you take a moment to look, you may find an amazing detail shot. 

Blue Ridge Parkway, Forest of Flowers

Blue Ridge Parkway, Forest of Flowers

Beaches

      In my experience with photographing beaches, the photoshoots seem to be more playful than the previous two locations. I tend to experiment a bit more with compositions, long exposures and my subjects. I have found that it is beneficial to stay low while taking images at the beach. By doing this, you emphasize the foreground subject matter and create visual tension between the foreground and background. Be careful to watch the waves! You don’t want to get caught off guard and have a wave hit your camera. Salt water can be very damaging to your camera and sensor. If you are planning on heading to the beach with your camera I recommend a Camera Rain Cover. There are many options available all with their own features and benefits. I have linked one that I personally like using that is inexpensive and does a decent job. I can't emphasize enough to protect your camera now to prevent a headache in the future.

USEFUL TIP: Plan your beach trips around interesting skies and tides. The sky goes a long way when photographing the beach. It can turn a relatively flat horizon line into a beautiful composition. Low and high tides can create drastically different effects. Don’t be afraid to have fun and experiment with your images!

Kure Beach, Coquina Rocks

Kure Beach, Coquina Rocks

Marshland

      If the mountains are my bread and butter, then the marshes are my kryptonite. If you are like me, try to use your fear to your advantage. Do your research ahead of time and plan your moves. If you are uncomfortable getting in the water, a location in the middle of the marsh may not be best for you to start with. For me the biggest issue was alligators. I’m sure that watching "Lake Placid" and "Creature Of The Black Lagoon" when I was younger didn’t help this fear .

      SO… before I came to North Carolina I researched alligators and learned a lot about these animals and subsequently have  less fear of them now (Crocodiles still scare the bejeezus out of me). More on that here: Understanding Alligators.

      When photographing marshes, I recommend side light early in the day. Try to align yourself at a 90 degree angle from the sun. Much like a forest too much contrast and information will make your images seem cluttered. I use my CANON 70-200 USM II f.4 to zoom in for detail shots. If you’re lucky enough to come across some fog in the morning, this can further enhance your wetland images. Check back next month for a post on my trip to the Great Dismal Swamp.

Lumber River, Sentinels  

Lumber River, Sentinels  

Here are 3 tips to help you loosen the nerves for your next photo outing:

1.) A little bit of research goes a long way. 

If you know where you are heading, I suggest looking it up on Google Earth to see how the light will fall throughout the day. This is one way I scout a location that I am not able to see in person before I shoot. Earlier I mentioned using the app Photographers Ephemeris to help you plan. Here are a couple more: Skippysky.com.au , Google Earth , Photographer's Tools , Meteo Earth 

If you don’t know exactly where you’re headed, it might be helpful to do an online keyword search and pull up some articles and images on interesting places around the area. These areas are always a good starting point. Once there, you can familiarize yourself with the location and broaden your search for the perfect shot.

2.)  Join the conversation!

Chances are, someone else has been to the location that you are headed to. They may have even written about it. Utilize this! Park offices, other photographers, Facebook, blogs, along with friends and family can all help you plan. If you are contacting other photographer's or park offices, I suggest avoiding broad questions when sending emails looking for more information. Instead try to come up with 2-3 specific questions that really ask what you need to know.

3.) Pack in advance

This may seem like common sense, but being prepared with the right gear can make or break your shoot. Packing in advance helps avoid the feeling of being rushed, and allows you to double and triple check that you have everything you might need. If you are heading to a marsh you don’t want to forget the Bugspray. Weather is unpredictable so I generally carry a Rain Jacket and Rain Pants that pack down small when out shooting.  Remember to have extra camera batteries charged, and check your headlamp! Packing in advance allows for peace of mind, peace of mind allows for confidence, and confidence makes great photos.

BONUS….

Using these 3 tips in order can help you feel ready to tackle a new photographic location. Once you’ve done your research, asked around for information from those who know the area, and packed ahead of time, the only thing that's left is to take some awesome photos!


If you found this post helpful, and would like to subscribe to my blog you can do so below. Subscribing is free and will give you regular trip reports, gear and location reviews, along with helpful tips and tricks to maximize your photographic potential.

This blog uses affiliate links. For those of you unfamiliar with affiliate links, these links help readers identify, research, and purchase useful items that are related to this blog and may interest them. Each time a reader purchases an item through one of these links I receive a small commission from the company from which the item was purchased which allows me to continue doing what I love.

Hope you enjoyed this post. See you out in the field!


All images are © Andrew Lockwood unless specifically stated otherwise.